Piggybank
Budget Management
The process of setting up budgets is really simple and provides full control of what you want to track and how.
Click on images within this article for easier viewing.
TABLE OF CONTENTS
Getting Started
- Select the Piggybank module from the left-hand navigation bar
- Select New budget (located top-right)
- Enter the budget name in the text field
- Click Create new budget to continue
Building Budgets
Selecting Create new budget will take you to the New budget page. There are three different sections to complete when building budgets. These are...
1. Setup

Here, you can:
- Change/amend the budget name
- Choose the budget tracking
- Select what the budget relates to
Explanation | |
 | Tracking basis This provides the option to use data from:
(If required, select the Use gross value checkbox for the budget to be based on gross spend). This choice will determine the options for how the budget will track. It is also dependant on the Pi modules you use. Cherry Pi orders - updates budgets once an order has been sent |
 | My budget relates to what? Dependant on your chosen tracking option will define the options to choose from regarding what the budget relates to. Choosing for budgets to be tracked by Invoices received will provide a couple more options to select (Nominal, Cost Centre - Pi's Purchase Coding module is required). This selection will determine other available drop-downs. |
 | The next drop-down provides the option to choose the site the budget will relate to. You can use the text field to help filter your search. Alternatively, you can set up a budget for all sites. |
The example below shows the budget will be tracked by Cherry Pi orders, it will relate to a single supplier and an individual site:

2. Budget

Here, you can:
- Choose the start date
- Select the budget period
- Enter the budgets amounts
Explanation | ||
| Set the Budget start date by clicking the calendar icon. | Choose the Budget period using the drop-down. | Enter the budget amounts based on the set period. Click Remove against a budget line if this is not required. |
 |  |  |
The example below shows a set starting date, a yearly period and budgets added for that set period:

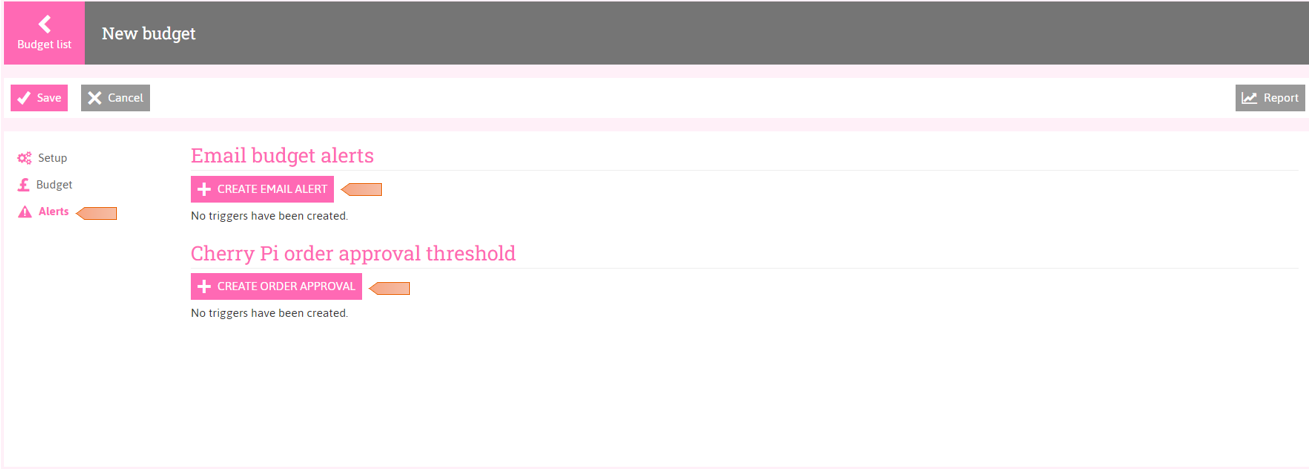
3. Alerts
Here, you can:
- Setup budget alerts
- Setup Cherry Pi approvals
These work through set threshold %, sending alerts to the email addresses of those added.
Budget Alerts - best used to help track budget spend and control who receives an alert once the threshold has been reached.
Email budget alerts are sent via email - advisory only - no action required.

Approval Thresholds - work in the same way as Budget Alerts, but also link in with Pi's Cherry Pi module. By setting these up, a Cherry Pi order has to be approved before being sent.
Email alerts and actions. You can approve an order through the emailed alert, or approve directly through Cherry Pi. Check out the Approving Orders article for more information. You will need to be using Pi's Cherry Pi module - contact your Account Manager to enquire for more information.

Orders need to be approved before supplier cut off times to ensure they arrive on the scheduled delivery dates. Approvers will need their Pi login set up to approve orders - contact the Pi Helpdesk to action this.
Explanation | |
  | Select the Create buttons to add alerts/approvals. |
 | Add multiple email addresses to alerts by adding a comma. |
  | Add a Threshold % to set when alerts are to be sent/orders to be approved. Add the e-mail address(es) for those that are to receive alerts/approve orders. |
 | Applies to Approval Thresholds only. The Laddered approval system will result in only the higher budget threshold recipient receiving the approval email. |
 | Select the Disabled checkbox if you need to disable an alert. Select the Delete button if you need to delete an alert. |
The example below shows the advisory and action alerts that have been set up:
Saving Budgets
Once the Setup and Budget sections are complete, click Save.
Saved budgets will show within the Piggybank dashboard:

Related Articles

Contact Us
If you need any additional help, please get in touch.
Was this article helpful?
That’s Great!
Thank you for your feedback
Sorry! We couldn't be helpful
Thank you for your feedback
Feedback sent
We appreciate your effort and will try to fix the article